Dear Hungry Reader,
Because so many of you have written to me to ask for stories and recipes that were first published in the now defunct Zester Daily (sadly gone the way of so many other high quality food publications), I’ll be posting them here. Subscribe to my blog (on this page, upper right) if you haven’t already and little by little, they’ll all come your way.
Sincerely,
Julia
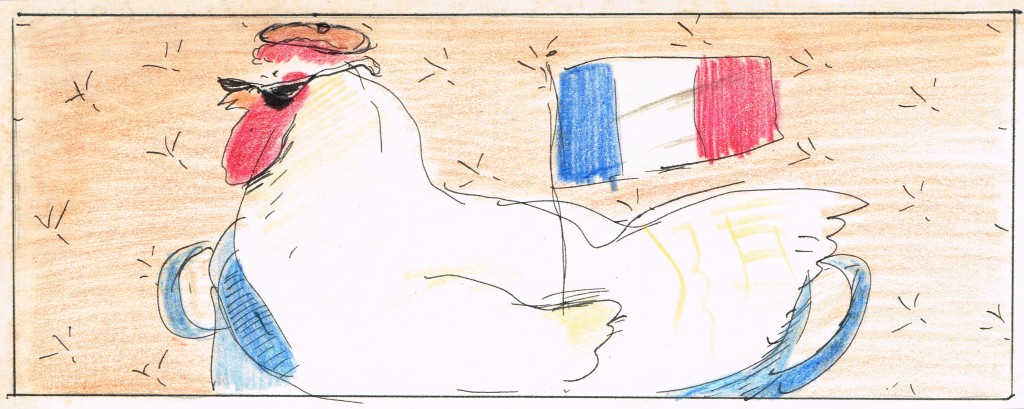
Illustration Copyright Laura Cornell 1981 for The Discriminating Diner, my weekly restaurant review and food column in the 1980s for Suburbia Today, a Gannett publication.
You can always judge the quality of a cook or a restaurant by roast chicken.
So wrote Julia Child in Mastering the Art of French Cooking. It was a bold statement, but it reflected a certain historic reverence for the fowl, which in France has historically been considered “the best of all birds covered by the name of poultry,” as 20th-century French culinary authority André Simon put it in his A Concise Encyclopedia of Gastronomy. Even my mother, a fine Italian cook, raved about the delicious roast chicken in France. After visiting our relations in Paris, she would speculate about what it was that made the chicken so tasty and delicate. The poultry for sale in butcher shops there were plump without being fatty, their flesh pink, not yellow. Try as she would, she couldn’t reproduce the same results with the commodity chickens (“machine-made,” as they were known in our family) she faced back home in New York.
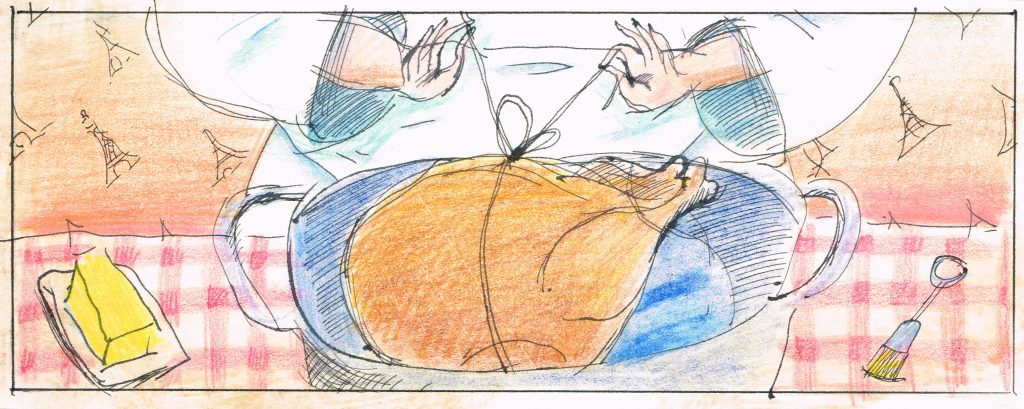
Illustration Copyright Laura Cornell, 1981 for Julia della Croce’s Discriminating Diner column a 1980s Gannett publication.
Illustration Copyright Laura Cornell 1981 for The Discriminating Diner, my weekly restaurant review and food column in the 1980s for Suburbia Today, a Gannett publication.The first secret of the famous roast chickens of France concerns their feed and rearing. Take the famous poulet Bresse, a “controlled” breed that is considered the most flavorful in the world. The birds roam freely, happily pecking and scratching in the grass, their foraged food supplemented with milk and corn. These prime specimens carry their own official appellation d’origine contrôlée, a set of regulations that guarantees their authenticity, much like wine. In the past, to acquire chickens of similar quality here in the States, you needed to know a good local farmer or raise them yourself; today, however, wholesome poultry has become commonplace in American markets, and I am convinced that anyone who starts out with a well-fed, free-range bird can duplicate the delicious poulet rôti.

Illustration Copyright Laura Cornell, 1981 for Julia della Croce’s Discriminating Diner column a 1980s Gannett publication.
The other secret to roast chicken is the size and freshness of the bird, along with a few roasting techniques that are traditionally practiced by French home cooks and professionals alike. “Too small a bird does not roast well in the oven because its flesh is cooked before its skin has time to turn the expected appetizing golden color,” French chef and teacher Madeleine Kamman explained in her authoritative The Making of a Cook. On the other hand, a bird weighing larger than three to four pounds takes longer to cook through to the bone, by which time the breast is overcooked. Most chefs concur that a six-month bird weighing in at four pounds, the smallest in the so-named “roaster” category, is ideal. At that weight, the bird has more meat on it than younger, so-called “fryers,” and it is still tender.
As for roasting, I learned the method early on at Peter Kump’s New York Cooking School, which taught classic French cuisine. Years later, when Italian cooking became all the rage, I would spend many happy hours teaching there, but when I first met Peter, I was a young food writer with an assignment to write an instructive article on proper roasting techniques. When I called him with some questions, he invited me to sit in on a class he taught devoted entirely to roasting chicken. The results were a revelation, and even now, I can say that the chicken I ate that evening was one of the most delicious I have ever tasted: crusty-skinned and juicy. Even the breast, which I usually avoid, was moist and tasty, saturated with the flavors of butter and tarragon. I was initiated. The recipe became a keeper in my otherwise largely Italian repertoire.
The classic, straight oven-roasting method involves starting at a fairly high temperature to sear and brown the skin, then lowering the heat to cook the meat through. The technique follows, unaltered over the years save for a few tweaks — the most important being pre-salting and then air-chilling the bird before cooking, a simple step that keeps the moisture in and results in astonishing flavor and crispy skin.
One of my motives for this writing this story is to bring to light the whimsical watercolors by Laura Cornell, the first drafts of several different illustrations she came up with for my original story in 1981. Because the art director decided to use a different illustration for the piece, they are published here for the first time.
Illustration Copyright Laura Cornell, 1981 for Julia della Croce’s Discriminating Diner column a 1980s Gannett publication.
French-Roast Chicken with Herbs, Garlic and Pan Gravy
Prep Time: 30 minutes, plus 8-48 hours for chilling
Cooking Time: approximately 1 hr, 15 minutes
Total Time: about 2 hours
Yield: serves 6
One of the most important roasting tricks is to select a pan that will prevent the bird from steaming rather than roasting. It should be just large enough to fit the bird easily, no larger. For a 4-pounder, the appropriate size is 8 x 11 inches, and no more than 2 inches high, fitted with a V-rack that will cradle the bird and elevate it above the sides of the pan. The trick to keeping it moist and juicy during roasting is to truss the chicken well, plumping it up and manipulating it into a snug ball before securing it with kitchen twine. See Golden rules for poulet rôti, below, for essential cook’s tips.
4 large cloves garlic
3 tablespoons soft unsalted butter, plus additional melted butter or good olive oil for basting
1 4-pound free-range chicken
Fine sea salt
Freshly ground pepper
1 bunch fresh tarragon sprigs; alternatively, rosemary or thyme if you prefer
3-4 teaspoons kosher salt
Suggested equipment: 8 x 11 x 2-inch baking pan, V-rack to fit the pan, instant-read meat thermometer, cotton kitchen twine
- Grate one garlic clove finely, preferably with a microplane grater, and blend it with the soft butter. Holding the chicken over a sink, drain any liquid out of the cavity and remove any giblets. Use paper towels to blot the chicken well inside and out until it is absolutely dry (no need to wash it). Remove excess fat from the chicken, taking care not to tear the skin. Sprinkle the cavity lightly with salt and pepper and slip in the remaining garlic cloves and some of the herb sprigs of your choice. Gently and carefully separate the skin from the flesh of the breast and thighs without tearing, using your fingers or the rounded end of a wooden spoon. With your fingers, insert the garlic butter into the pockets, smearing as much of the flesh as you can. Push in the remaining herb. Rub the inside of the neck cavity with any garlic butter that remains. Sprinkle kosher salt and pepper on the skin, covering all surfaces. Transfer the bird, breast side up, to a rack on a platter to allow air circulation and chill, loosely covered with a thin cotton dish towel, for 8 to 48 hours.
- Before cooking, bring the bird to room temperature for 1 hour. Preheat an oven to 450 degrees F (425 degrees F convection) for at least 20 minutes. Preheat the roasting pan.
- Make sure that the skin is completely dry. Truss the chicken using cotton kitchen twine, drawing the legs close to the breast to plump up the bird, and tying the ankles together securely. Tuck the wings under the back; alternatively, pass string around its girth and tie the wings securely. Brush melted butter or olive oil on the entire surface of the bird and place it breast-up on a cold oiled V-rack in the pre-heated roasting pan.
- Slide the pan onto the middle oven rack, legs facing the oven rear where the temperature is hotter. Roast for 15 minutes. Remove the pan from the oven and reduce the oven temperature to 375 degrees F (350 degrees F for convection) Turn the bird on one side and baste with butter [or olive oil]. Return it to the oven and roast for 20 minutes. Then repeat the procedure for the other side, roasting for 20 minutes more. Take the chicken out to check the internal temperature, inserting the instant-read thermometer into the thigh at the thickest part, away from the bone. It should register at 170 degrees F. If it is not cooked through, flip the bird on its back and return it to the oven for 5-minute increments until it reaches the right temperature. It should be a uniform golden color with crisp, taut skin. Transfer the bird to a carving board with a gutter that will capture its juices. Remove the strings and let it rest for 30 minutes in a warm place.
- While the bird is resting, make the gravy. Use a wooden spoon to dislodge any bits of meat stuck to the bottom of the roasting pan. Add 3-4 tablespoons water to the drippings. Warm the roasting pan on the stovetop over medium heat. Simmer to reduce the liquid to about 1/2 cup, then pour through a fine mesh strainer. Separate the grease from the natural juices using a spoon or a fat separator. Check for seasoning.
- When the bird has rested, detach the wings and legs at the joints. Use a very sharp carving knife to cut the breast into thin slices. Arrange all nicely on a warm platter. Discard the herbs in the cavity. Add any juices that have collected during carving to the gravy you have made. Pour a little of the gravy over the carved chicken and pass the rest at the table.
Golden rules for poulet rôti:
Preparing the bird:
- To keep the juices in, truss the bird using cotton kitchen twine, tying the ankles together and drawing them close to the breast.
- You can either tuck the wings under the back or tie a string around the girth to fasten them.
The roasting pan and other equipment:
- To prevent the bird from steaming rather than roasting, select a pan not more than 2 inches deep. The pan shape and size should be just large enough to fit the bird easily and no larger. For a 4-pound bird, it should be 8×11 inches fitted with a V-rack that elevates the bird above the sides of the pan.
- An alternative to a rack is to elevate the chicken on a single layer of thickly sliced carrots and onions (or lemon slices, if you like).
- Fowl takes on the flavor of all the other ingredients in the roasting pan. Carrots and onions are the classic aromatics. If the vegetables are permitted to burn (which is likely if the pan is too large for the bird), the roast will take on their bitterness.
- Use a good meat thermometer to test doneness. Cheap ones lose their accuracy after a few uses.
- If you make stuffing, bake it in a separate buttered dish.
Turning and basting:
- While everyone would probably agree that the best way to ensure a juicy bird with crisp skin is to spit-roast it, turning and basting in the home oven simulates the rotisserie principle. Use melted butter, good olive oil or a mixture of the two for basting, not broth — it makes the skin flabby.
- Each time you remove the bird from the oven to turn and baste, shut the oven door immediately. Even a minute with the door open will throw off the temperature and cooking time.
- Allow the chicken to rest 20-30 minutes before carving. This helps the bird to retain its juices; instead of immediately running out at the point of a knife, they will retreat into the tissues of the bird and stay there.